
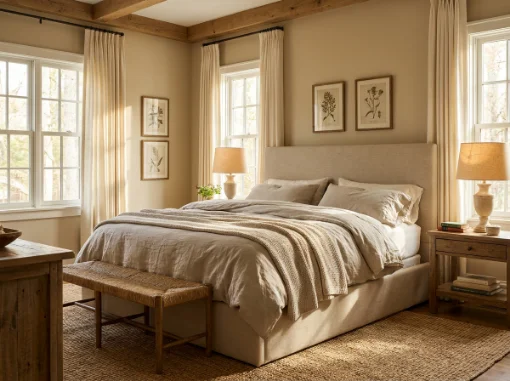
Our bedroom had the same flat beige walls for almost two years after we bought our home in 2021. I kept saving accent wall ideas but never acted on them. I was too worried about choosing the wrong wall. I finally took the chance, and the change surprised me. The room felt much cozier at night. Here are seven bedroom accent wall ideas I tried, tested, or seriously considered. I’ve also included a few things I would do differently next time.
1. A Moody Painted Wall Behind the Headboard
This was the first accent wall I tried, and it is still my favorite. I chose the wall behind our bed and painted it Sherwin-Williams Naval. It is a deep navy that looks almost black in the evening. In the morning, it looks more blue. A gallon cost us about $65. I also spent $18 on a good angled brush because my old brush left streaks.
The wall behind the headboard is a great place for a bold color. You see it often, but you do not stare at it all day. That makes a dark shade feel less overwhelming. It also makes the bed look more finished. If navy feels too dramatic, try deep sage or clay terracotta. Both can create a warm and cozy feeling.
For a cheaper option, test the color first. I bought a $9 sample from Home Depot and painted it on poster board. I moved the board around the room during the day and at night. This helped me avoid choosing a color that looked completely different after it dried.
2. Wood Slat Paneling, DIY Style
Mark and I decided to build a wood slat wall ourselves. We thought it would be a simple weekend project. It was not quite that easy. We used furring strips from Lowe’s. Each one cost about $4, and we needed around 14 strips for our 10-foot wall.
The basic plan was easy. We measured the wall, cut the wood, spaced the strips, and nailed them in place. The problem was that our wall was not as square as we thought. The first three strips looked great. The fourth one showed a gap near the top.
We had to make another trip to Lowe’s for wood filler and touch-up paint. A project we expected to finish in one afternoon took almost two full days. The final cost was about $140, including the stain.
If you try this idea, check the wall before cutting your wood. A level and stud finder can save you a lot of frustration. I skipped the stud finder at first. Two of our strips ended up needing far more spackle than I want to admit.
3. Wallpaper on One Wall Only
Wallpaper made me nervous at first. I had heard plenty of stories about bubbling and peeling. That worried me even more because our summers in North Carolina can be very humid. I decided to try peel-and-stick wallpaper instead.
I found an option at Target for about $38 per roll. We needed three rolls for our wall. The installation went better than I expected. I did have one small bubble near a corner after about a month. Our AC had been acting up, so the temperature in the room had changed quite a bit.
I used a hairdryer to gently warm the area. Then I smoothed the wallpaper back down. The bubble disappeared. Peel-and-stick wallpaper is also a good choice if you do not want a permanent change. Many options can be removed without taking the paint underneath with them.
4. A Gallery Wall as the “Accent”
An accent wall does not have to involve paint or wallpaper. In our daughter’s room, we used framed artwork instead. We mixed her own drawings with a few printed pieces. Some frames cost about $12 from Michaels. A couple of larger ones from HomeGoods were around $45.
I planned the arrangement before putting anything on the wall. First, I placed all the frames on the floor. Then I traced each frame onto kraft paper. I taped those paper shapes to the wall and moved them around until the spacing looked right.
Only after that did I start hammering nails. This extra step took a little time, but it saved us from making a dozen unnecessary holes. A gallery wall is also easy to change. As kids grow and their interests change, you can swap out the artwork without changing the entire room.
5. A Textured Plaster or Limewash Finish
I have not tried this one in our own bedroom yet. However, I have watched several tutorials and talked with a contractor we hired for other work. Limewash is still high on my list.
The finish has a soft, cloudy look. It adds texture without making the wall feel busy. It can also make a simple bedroom look more layered and finished. Depending on the product and wall size, you may spend around $50–$90 for enough material.
Limewash does require more patience than regular paint. You usually work in layers instead of rolling one flat coat across the wall. The drying process can also take longer in humid weather.
If you try it in a humid climate like ours, give the wall plenty of time to dry. Good ventilation helps too. I would also avoid rushing the next coat just because the surface feels dry.
6. Board and Batten, Half Wall Height
Board and batten is the next accent wall idea on my list. I like it because it adds architectural detail without covering the entire wall. It also works well with the transitional farmhouse style in our home.
The basic idea is simple. You add vertical boards with horizontal trim pieces across part of the wall. Then you paint the trim and wall to create a finished look. You can also use a contrasting color if you want the pattern to stand out more.
My rough estimates are around $150–$250, depending on the trim you choose. Labor can also change the price if you hire someone. For a DIY project, measuring carefully is one of the most important steps. Uneven spacing can make the finished wall look messy.
7. A Bold Ceiling-to-Floor Curtain Panel
This is the least expensive idea on my list. I actually use it in our son’s room. Instead of painting or wallpapering the wall, we hung one oversized curtain panel behind his bed.
The curtain came from Target and cost about $30. We used a tension rod, so there was no complicated installation. The whole project took around twenty minutes.
I especially like this idea because it solved a specific problem in the room. There is an odd built-in shelf behind the bed that we do not love. The curtain hides it without permanently changing the wall.
It is also easy to remove when we want a different look. If you live in a rental or simply do not want a major DIY project, this is worth considering.
Mistakes I’d Avoid Next Time
My biggest mistake was starting the wood slat wall without checking whether the wall was square. A quick check with a level would have saved us a second trip to the store. It would also have made the installation much easier.
I also wish I had tested the navy paint in several places on the actual wall. The corner near our closet gets very little natural light. The color looks much darker there than it does near the window. I did not notice that until the entire wall was painted.
Lighting can change an accent color more than you might expect. Always test your sample during the day and at night. Check it near windows, corners, and artificial lights before committing.
One final reminder is important for older homes. If your house was built before 1978, have old paint tested before sanding or scraping it. Older paint can contain lead. Our late-1990s home did not have this issue, but it is something worth checking before starting a wall project in an older house.
In the end, you do not need an expensive makeover to make a bedroom feel different. A gallon of paint can completely change the mood. So can a few pieces of trim, removable wallpaper, framed artwork, or even one large curtain panel. Start with the idea that fits your budget and comfort level. You can always make the next accent wall a little more ambitious.
