
When we first decided to replace our awkward kitchen peninsula with a freestanding island, I assumed it would be a simple upgrade that would instantly make our kitchen more functional and stylish. Instead, it became one of the biggest design lessons in our home renovation journey. From layout mistakes and seating frustrations to lighting decisions and storage regrets, I quickly realized that creating a kitchen island that truly works takes far more planning than most people expect. While kitchen islands can absolutely transform your space, the wrong design can disrupt traffic flow, waste valuable square footage, and create daily inconveniences. In this guide, I’m sharing the practical kitchen island design ideas that actually worked in our real home not just the picture-perfect trends. Whether you’re remodeling a small kitchen or designing your dream layout from scratch, these tips will help you choose an island that balances style, function, storage, and everyday usability.
1. Prioritize Proper Size Over Trendy Oversized Designs
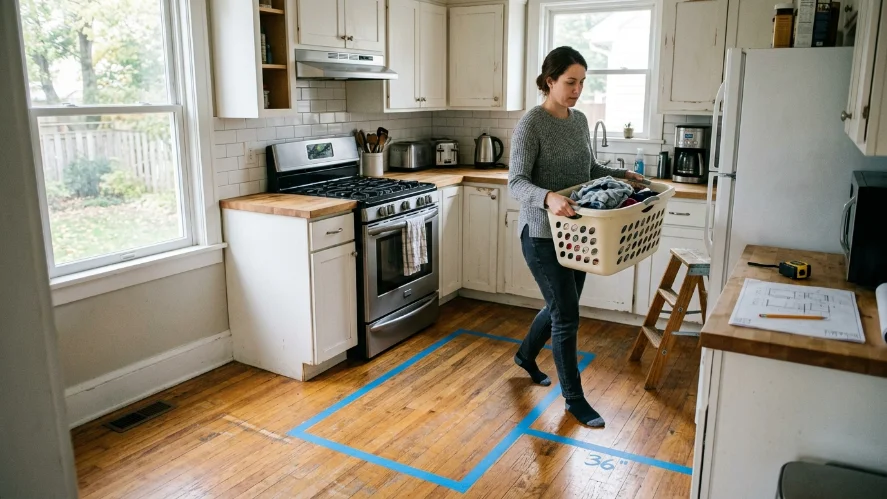
One of the most common mistakes homeowners make is choosing an island that’s too large for their kitchen. Oversized islands may look luxurious in magazine spreads, but in average homes, they often create cramped walkways and awkward traffic flow.
Your island should enhance movement, not restrict it. Ideally, you need:
- At least 42 inches of clearance on all sides
- 48 inches near ovens, dishwashers, or refrigerators if possible
- Enough space for multiple people to move comfortably
Before buying or building anything, tape the proposed dimensions directly onto your floor. Live with that outline for a few days. Open cabinets, unload groceries, and walk through the space during busy moments. This simple test can reveal layout problems before they become expensive.
In smaller kitchens, compact DIY options can work beautifully. Repurposed cabinets, modular storage systems, or furniture-style islands often provide better flexibility than bulky custom pieces.
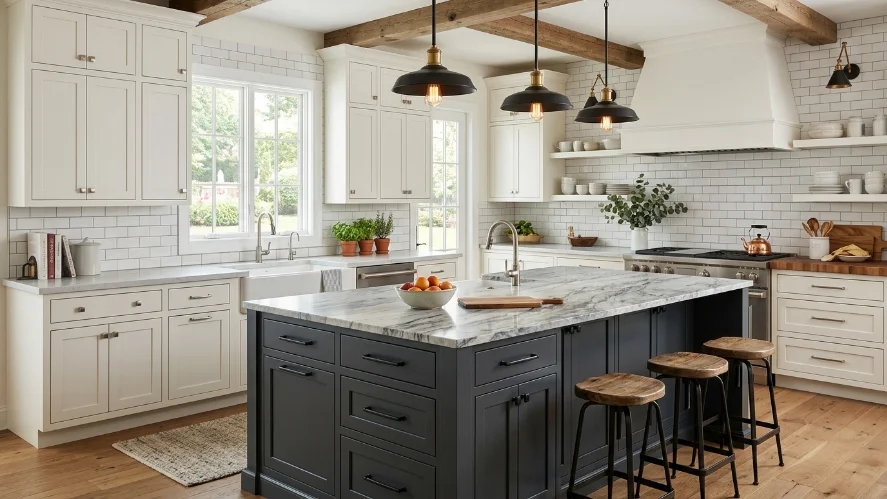
2. Make Color Choices Feel Intentional
Your island doesn’t have to perfectly match your existing cabinets, but it should absolutely look deliberate.
The biggest visual mistake is selecting an island finish that almost matches surrounding cabinetry but feels slightly off. This often creates an accidental or mismatched appearance.
Instead, choose one of two routes:
Option A: Full coordination
- Matching cabinet color
- Matching hardware
- Seamless integrated look
Option B: Bold contrast
- Dark island with light cabinets
- Natural wood island with painted perimeter
- Statement color island with neutral surroundings
Contrasting islands often feel more custom and visually interesting when done correctly. Deep navy, charcoal, sage green, or warm wood tones can create focal points without overwhelming the space.
Hardware also matters. Mixed metals can work beautifully, but keeping finishes limited to two creates cohesion.
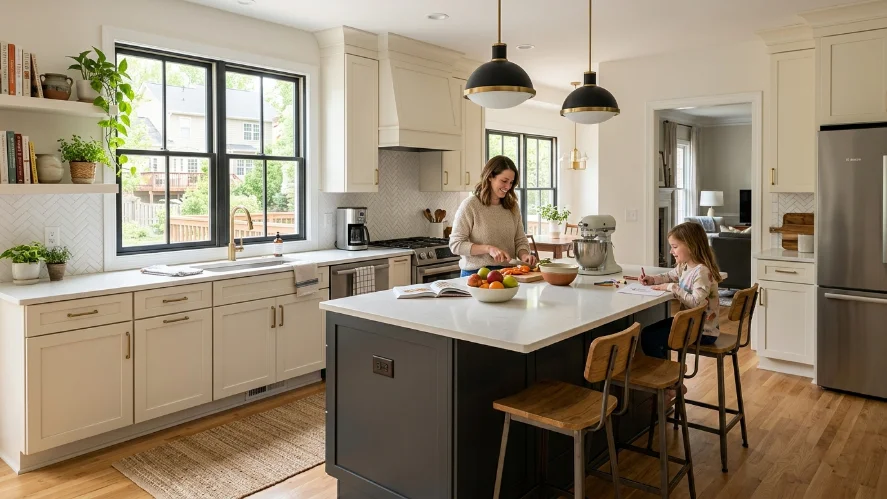
3. Think About Seating Early Not Last
Seating is where many island designs fail.
At first glance, adding stools seems simple. But spacing, stool width, overhang depth, and comfort all dramatically impact usability.
Here’s a general guide:
- Counter height (36 inches): 24–26 inch stools
- Bar height (42 inches): 28–30 inch stools
- Table height (30 inches): Standard dining chairs
Allow roughly 24 inches of width per stool so people aren’t crowded.
Families with children should strongly consider supportive seating. Backless stools may look sleek, but they’re often less comfortable and less safe for daily use. Upholstered or backed stools can provide better long-term comfort, especially for homework sessions, quick meals, or entertaining.
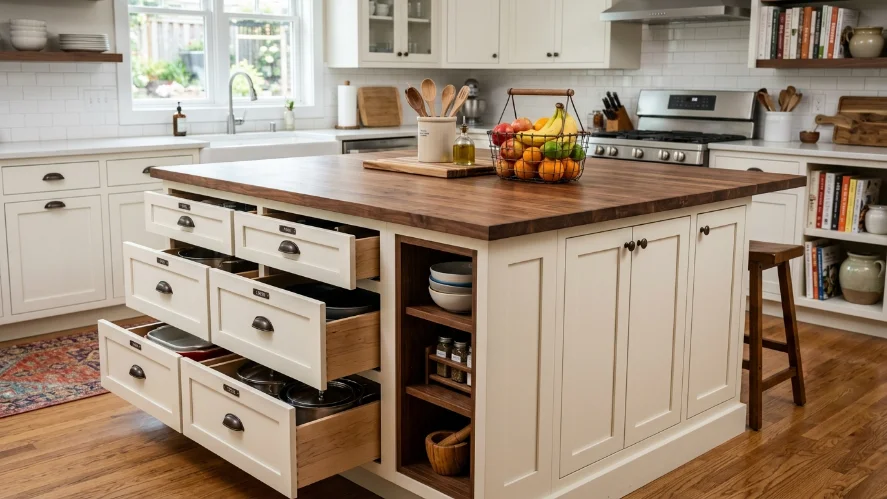
4. Focus on Smart Storage Solutions
A kitchen island should work harder than simply looking good.
Open shelving may seem charming in design photos, but in reality, it often becomes:
- Dusty
- Cluttered
- Harder to maintain
- Less functional for everyday storage
Instead, prioritize practical storage like:
- Deep drawers for pots and pans
- Pull-out trash bins
- Hidden shelves
- Appliance storage
- Utensil drawers
- Vertical tray storage
Combining drawers on one side with cabinets on the other often maximizes flexibility.
If you still want decorative elements, consider one small open shelf section for cookbooks or baskets rather than fully exposed storage.
The goal is balance: beautiful but useful.
5. Lighting Is More Important Than Most People Realize
Lighting above your island isn’t just decorative it’s essential for both function and atmosphere.
Poor lighting can make food prep harder, create shadows, and reduce the island’s role as a workspace.
Pendant lights are one of the best solutions because they:
- Add task lighting
- Define the island visually
- Introduce style
- Improve ambiance
General rules:
- One pendant per 2 feet of island length
- Hang fixtures 30–36 inches above the countertop
- Use warm white bulbs (2700K–3000K) for inviting light
Oversized fixtures can overwhelm smaller kitchens, while undersized pendants may feel visually weak.
If your kitchen lacks existing electrical placement, hiring a licensed electrician is usually worth the investment. Electrical shortcuts often lead to bigger expenses later.
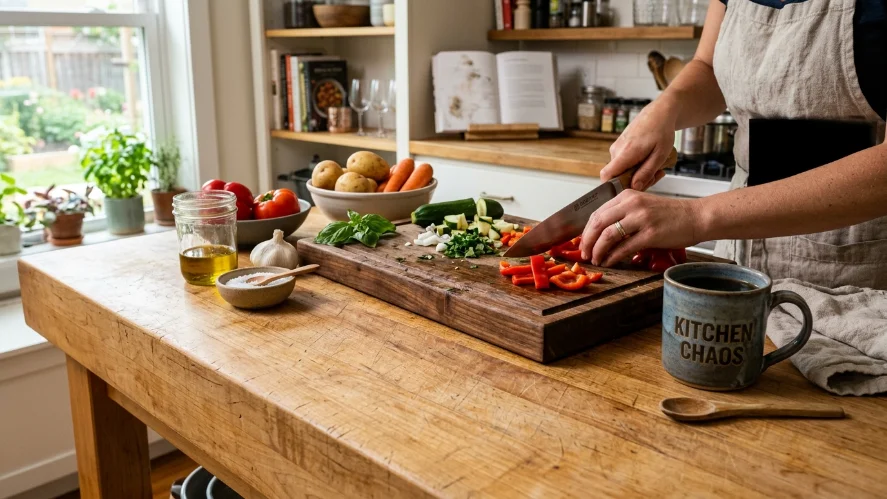
6. Pick Countertops Based on Real Life
Your island surface will likely become the hardest-working spot in the kitchen, so choose wisely.
- Butcher block: Warm and affordable, but requires maintenance
- Quartz: Durable and low-maintenance, but pricier
- Tile: Budget-friendly and customizable, though grout upkeep matters
Think about your habits, budget, and maintenance tolerance before deciding.
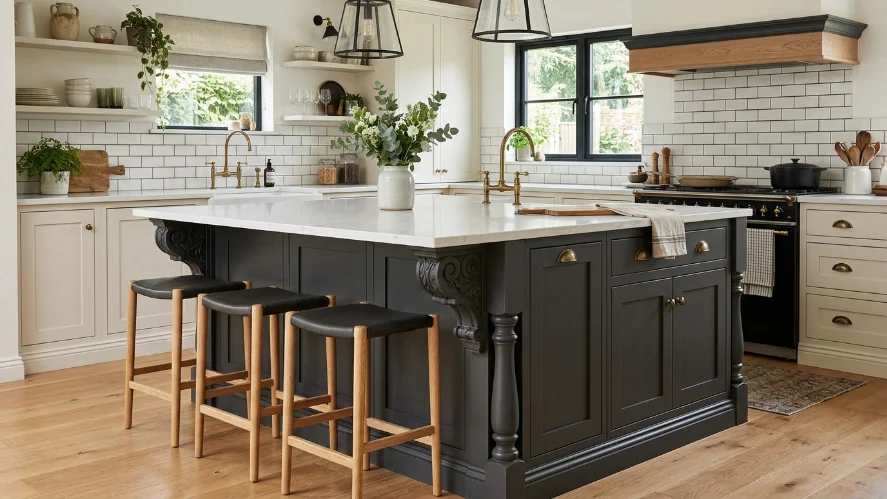
7. Add Custom Details That Elevate the Design
Without thoughtful finishing touches, many islands can feel boxy or generic.
Simple upgrades can transform even budget-friendly islands into polished focal points:
- Decorative corbels
- Shiplap paneling
- Board-and-batten ends
- Furniture-style legs
- Contrasting toe kicks
- Open bookcase ends
- Decorative trim
These details create the impression of custom cabinetry without dramatically increasing costs.
Even small additions can make your island feel more intentional and integrated into the home.
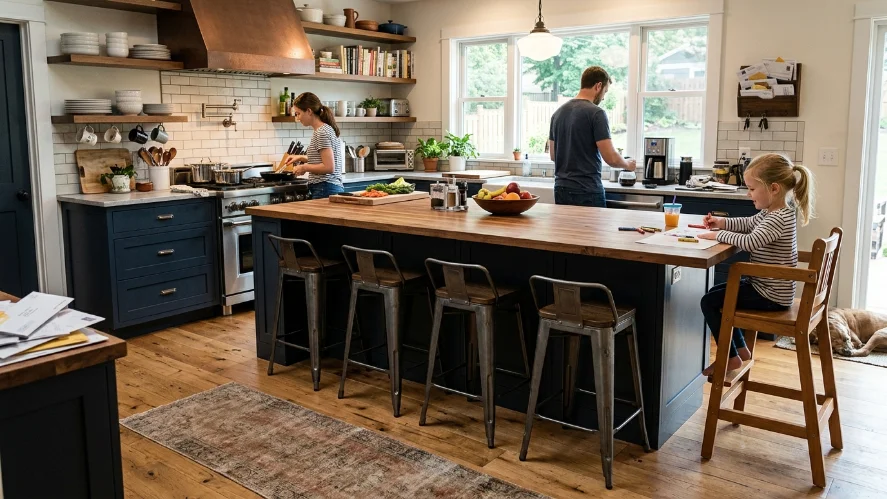
Bonus Must-Have: Add Electrical Outlets
If there’s one thing I wish we had done differently, it’s adding outlets.
A kitchen island often becomes the center of daily life, used for:
- Mixers
- Laptops
- Phone chargers
- Holiday cooking
- Slow cookers
- Kids’ schoolwork
Skipping electrical access may save money upfront, but it often becomes a major regret later.
Installing outlets during construction is significantly easier and more affordable than retrofitting after completion.
Common Kitchen Island Mistakes to Avoid
Here are the biggest regrets many homeowners face:
- Choosing style over function
- Ignoring traffic flow
- Underestimating seating needs
- Skipping outlets
- Poor lighting placement
- Using impractical storage
- Selecting high-maintenance surfaces without preparation
Avoiding these mistakes can save thousands.
Final Thoughts
A kitchen island is often the heart of the home, but only when designed for real daily living. The best islands are not necessarily the biggest, trendiest, or most expensive. They’re the ones that genuinely improve how your kitchen functions.
When planning your island, prioritize:
- Movement
- Storage
- Seating
- Lighting
- Durability
- Personality
A thoughtfully designed island can become the space where meals are prepped, homework is finished, guests gather, and daily life happens more smoothly.
After living through our own kitchen island renovation, I can confidently say that practical decisions matter far more than perfection. Design for your actual life, and your kitchen island won’t just look beautiful it’ll truly work for years to come.
